For those looking to root their Blackview BV8000 Pro, the first step is to install TWRP custom recovery on the Blackview BV8000 Pro. The process contains quite a few steps, but most of them take just a few seconds.
If it looks daunting, don’t worry, take each step one by one and you’ll come through with a rooted Blackview BV8000 Pro within just a few minutes.
1. Download
- MTK MediaTek auto preloader drivers #1 pack– These are the drivers that will allow the MTK SP Flash Tool to communicate with your mobile. Try these drivers first, as they may eliminate the need to disable Windows driver signing. If you have any issues then use the #2 pack.
- MTK MediaTek auto preloader drivers #2 pack – These are the drivers that will allow the MTK SP Flash Tool to communicate with your mobile. You made need to disable Windows driver signing enforcement (see video).
- Download latest SP Flash Tool – This is the tool that will be used to flash Blackview BV8000 Pro with TWRP
- Blackview BV8000 Pro root pack – This pack includes the Blackview BV8000 Pro TWRP, Blackview BV8000 Pro stock recovery, Blackview BV8000 Pro stock boot, SuperSU.zip, and Blackview BV8000 Pro scatter file download (MT6757_Android_scatter.txt).
[spoiler style=”steelblue” collapse_link=”false” title=”KNOWLEDGE POINT about scatter files. Click here to read”]NOTE: A scatter file is what tells SP Flash Tool where to flash various parts of the firmware on your phone’s EMMC.[/spoiler]
2. Install MediaTek MT6757 Helio P20 preloader drivers
If you don’t already have MTK Preloader Drivers installed, we’ll go through that step now. NOTE: If you get an unsigned driver error and can’t continue with the driver install, then go to step #3. NOTE: Use #1 pack or #2 pack. Do not need to use both.
[spoiler style=”steelblue” collapse_link=”false” title=’If MTK MediaTek preloader vcom driver pack #1, click here’]
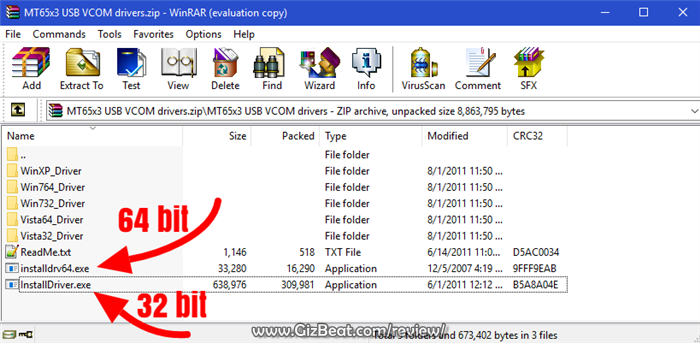


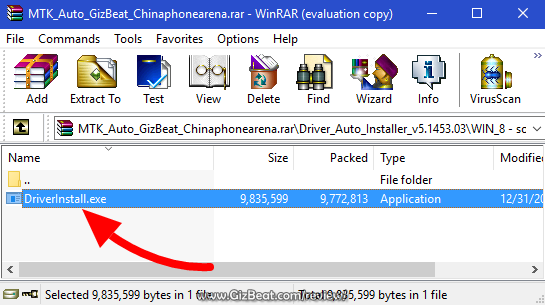
- Open the MTK adb vcom auto install driver pack #1 in WinRAR / unZip
- No need to extract, double click DriverInstall.exe or installdrv64.exe for x64 bit Windows
- Allow any permission requests
[spoiler style=”steelblue” collapse_link=”false” title=’If MTK MediaTek preloader vcom driver pack #2, click here’]
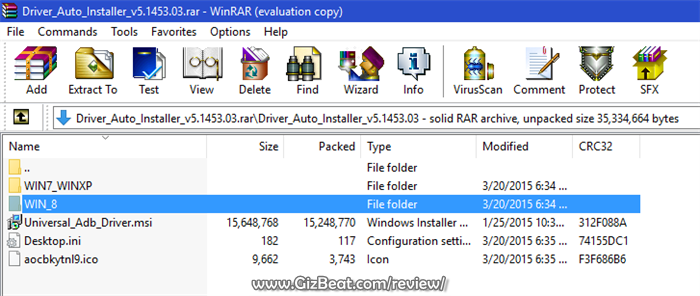
- Open the MTK MediaTek auto vcom driver install pack #2, and go to Win7_WinXP folder for 7 / XP, or Win8 folder for Windows 8 / Windows 10.
- No need to extract, double click DriverInstall.exe
- Allow any permission requests
- When you see “Windows can’t verify the publisher of this driver software”, click “Install this driver software anyway”
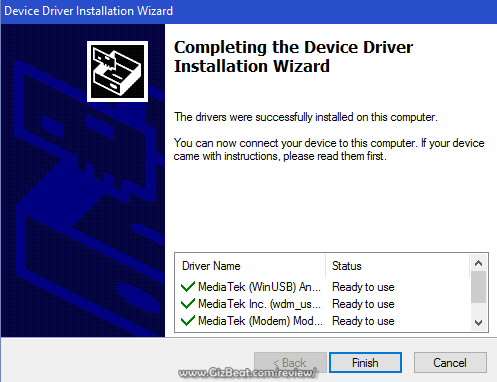
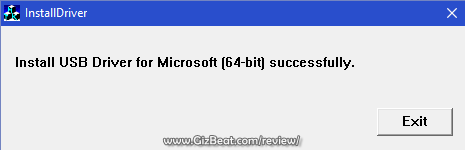
- At the end you shoold see something like this[/spoiler]
3. Turn off driver signature enforcement
Do this step if:
- You don’t already have MediaTek preloader drivers installed
and
- Getting error from Windows telling you drivers are unsigned and can’t be installed with pack #1 or pack #2
[spoiler style=”steelblue” collapse_link=”false” title=’Click for disable driver signature enforcement guide’]
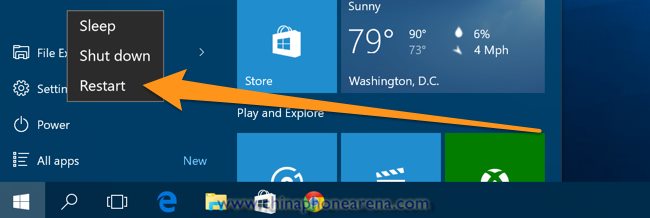
To install preloader drivers, some users of 64-Bit Windows may need to disable Driver Signature Verification / Enforcement. This quick procedure will have you up and modding your phone in no time.
- Hold SHIFT while left-clicking restart. It’s the same for Windows 8.1 and Windows 10.
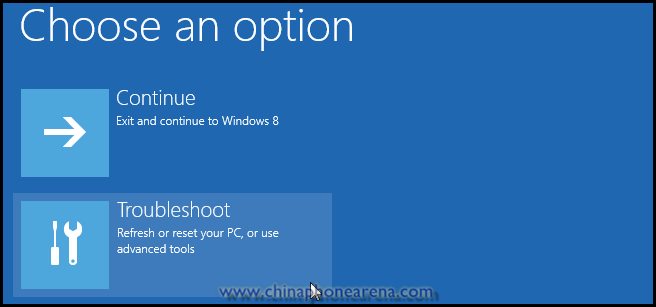
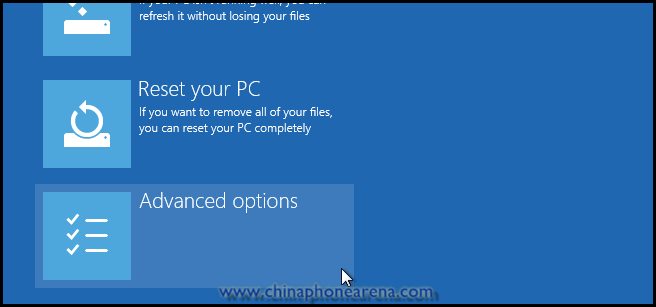
- Your computer will reboot and give you various options. Select “Troubleshoot”.
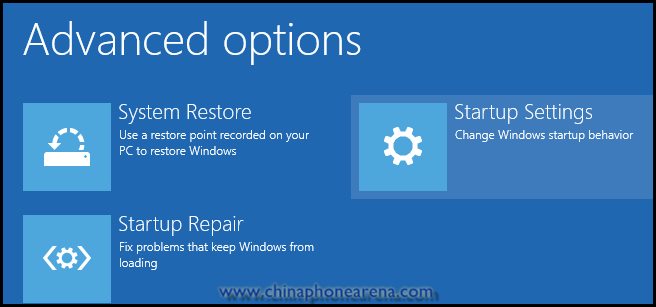
- Choose “Advanced options”.
- Choose “Startup settings”.
- Select “Restart”.
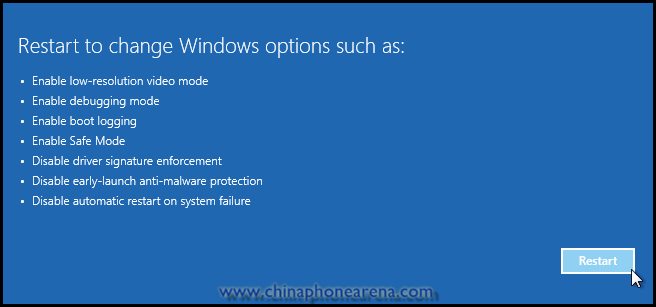
- Select “Disable driver signature enforcement”.

Your computer will now reboot into a mode which will allow you to install unsigned drivers, which is covered in the next steps.[/spoiler]
4. Install and run SP Flash Tool
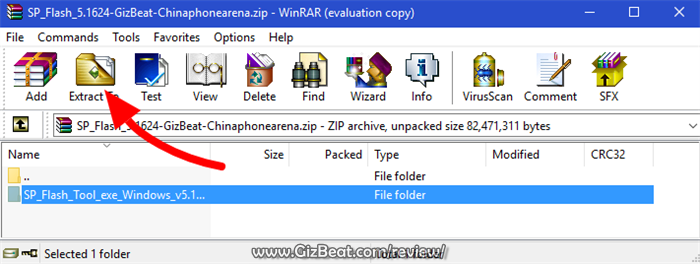
- After downloading the latest SP Flash Tool, extract it to a directory where you’ll know where it’s at.
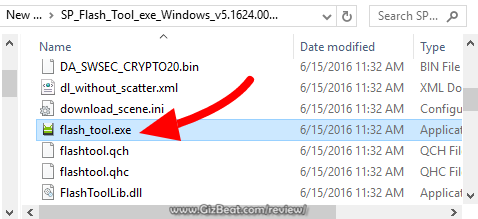
- Go to the extracted folder.
- Right-click ‘flash_tool.exe’ and ‘Run as administrator’
5. Copy SR1-SuperSU.zip from the root pack to the base of your phone, or to an SD card in your phone
6. Load the Blackview BV8000 Pro scatter
- If you haven’t already done so, extract the Blackview BV8000 Pro TWRP and root pack to a folder where you’ll know where it’s at.
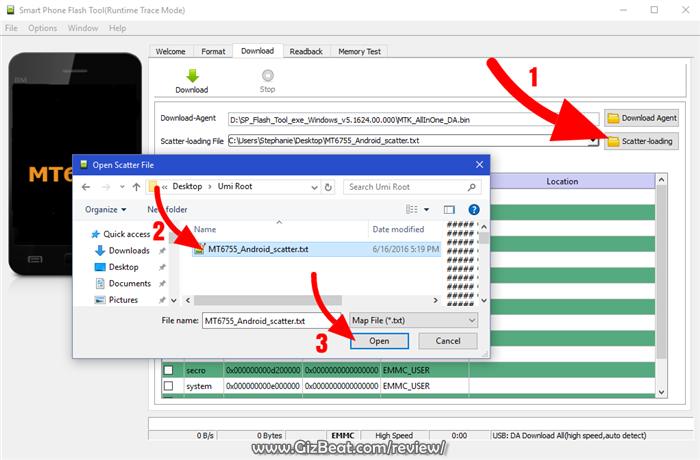
- Select ‘scatter-loading’ from upper-right of SP Flash Tools.
- Navigate to the folder that you extracted the Blackview BV8000 Pro TWRP pack to
- Select ‘MT6757_Android_scatter.txt’
- A checklist of different parts of the ROM shoold then show in the bottom portion of SP Flash Tools.
7. Select the Blackview BV8000 Pro TWRP custom recovery
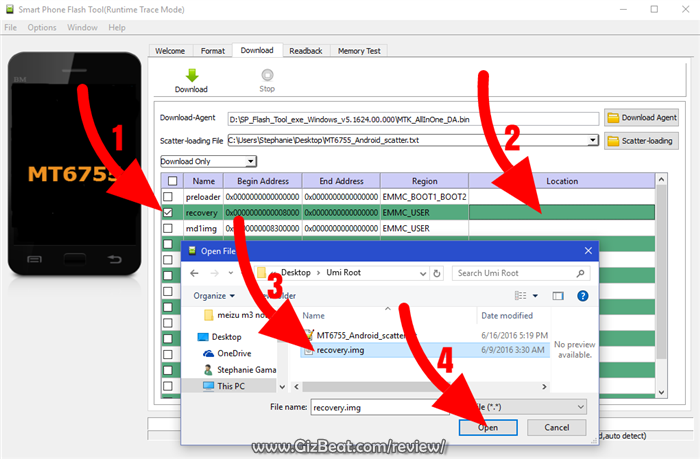
- If anything is selected besides ‘recovery.img’, deselect them all except ‘recovery.img’
- Double click the ‘recovery.img’ line in MTK SP Flash Tool (see video at 02:00)
- direct SP Flash Tool to the previously extracted Blackview BV8000 Pro TWRP (‘recovery.img’ in the Blackview BV8000 Pro TWRP pack)
8. Flash Blackview BV8000 Pro TWRP
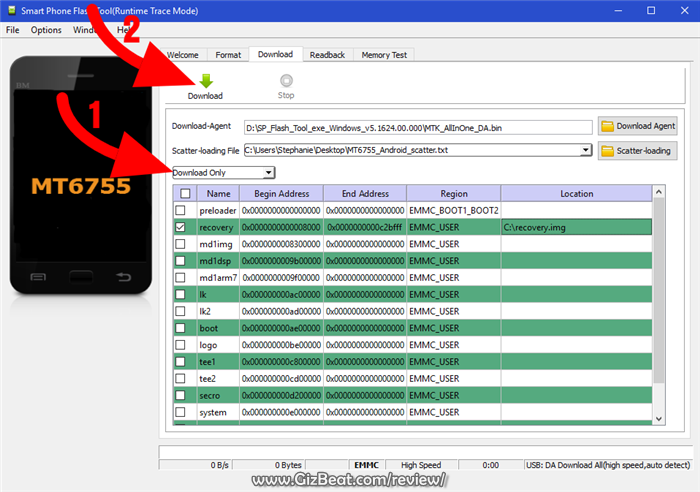
- NOTE: In the video above, I am flashing BOOT, not RECOVERY. The process is the same, but you will be flashing RECOVERY. Make sure to use “DOWNLOAD ONLY”, not “FIRMWARE UPGRADE” or “FORMAT+DOWNLOAD”
- Make sure the phone is disconnected from PC and that your phone is powered off.
- Make sure the box noted in the image above says ‘Download Only’
- Select ‘download’ from the top of SP Flash Tools.
- Connect USB cable to phone. Within a few seconds you shoold see a red bar come up. Wait a few more seconds and the flash shoold begin.
- It will all be over in just a few seconds, at which point you shoold see a dialog from SP Flash Tools telling you the flash is complete.

- If any errors, repeat the process but hold VolumeUp as you connect the phone and keep it held for several seconds after connecting.
9. Boot into Blackview BV8000 Pro TWRP recovery and root
- Disconnect your Blackview BV8000 Pro from the PC.
- Hold VolumeUp+Power until you see the Blackview BV8000 Pro logo show, then release Power, but continue holding VolumeUp until you see the Blackview BV8000 Pro booted into TWRP.
- Flash / Install SR1-SuperSU.zip that you previously copied to your phone.
Done! Good job. You now have TWRP and a rooted Blackview BV8000 Pro MT6757.
If you have any issues, comments, successes or failures, or just want to say thanks, please comment in the comment section and let us know.
Leave a Reply