A couple of months back I wrote a tutorial on how to change DPI per app. Initially I’d suggested that changing DPI for the entire system may not be the best of ideas. While there are still reasons for wanting to change DPI on a per app basis, I’ve found that for myself the method that works best is a system wide adjustment.
The best part about this method is that root isn’t required, and it actually ends up being a simpler process than editing build.prop or using apps which are often not successful at changing density.

What we’ll be learning today is how to change your DPI without root system wide. It’s a surprisingly simple procedure and I’ve tested it on several KitKat MTK mobiles, as well as the Lollipop based Intel Asus Zenfone 2.
What to do
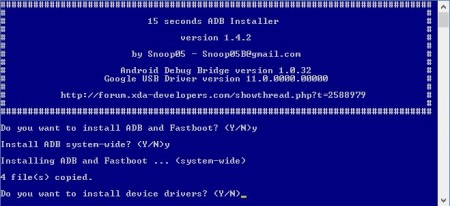
- This step sounds difficult, but really is as simple as it gets. Download and install the auto cmd adb command setup and adb USB debugging drivers from our files section on Facebook. This is the easiest all in one solution. It will install the drivers and the command set for communicating with your mobile device through cmd window.
- Enable USB debugging mode on on your phone.
- Connect your phone via USB to your PC/notebook/laptop.
- If a dialog pops up on your mobile, allow it. This is the mobile asking you if you want to give your PC debugging access to your device.
- Click your Windows Start button and in the search box type ‘cmd’ and hit enter. You should see a black command box pup up in Windows.


- Type ‘adb shell wm density 300’. You can use any number here between 120-400 in increments of 10 (120,160,240,250,300 etc…). You can play with this and see what fits you best. You should see an immediate change when the command is accepted, however things may look a bit funny until you reboot your phone. Rebooting is required to truly see what affect your change has made system wide.
- Here are some more useful commands:
- ‘adb shell wm density reset’ (set DPI to default)
- ‘adb shell wm size ####x####’ (emulate whatever resolution. Example: 1080×1920)
- ‘adb shell wm size reset’ (set resolution to default)


Change DPI on a rooted phone
If you’re rooted, there’s great news, as you don’t even need to plug your phone to PC.
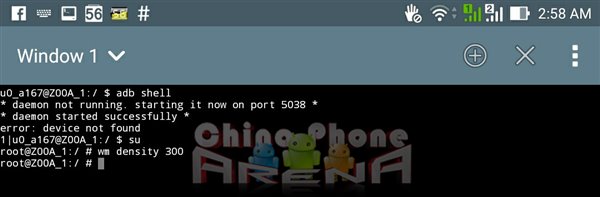
- Download and run this terminal app from Play Store
- Type ‘su’ into the terminal app (you can see in the image above that I couldn’t execute until entering root access).
- Use the commands as shown above, but omit the ‘adb shell’ portion. For example, to change your DPI to 300, you would type ‘wm density 300’.
- Reboot.
Let us know in the comments how this worked out for you.
Leave a Reply to cayok Cancel reply