
This Meizu M3 Note how-to ROM flashing without recovery guide tutorial will show you how to flash a full ROM or OTA onto your Meizu M3 Note without recovery, and should work for phones even if your bootloader is locked.
Meizu M3 Note MT6755 Helio P10 guides related to this guide (links open in new tab)
- How to change KingUser to SuperSU root Meizu M3 Note
- How to change ID and ROM of Meizu M3 Note from China to Global International
- How to root Meizu M3 Note
ROM downgrade “The firmware is too old”
If you’ve received an error in recovery that tells you the ROM kernel you’re trying to flash is older than the ROM you’re currently on, this guide will help you. Why? Because it sidesteps recovery and directly flashes the ROM through it’s own processes.
Keeps your root
If you’ve wanted to know how to flash OTA and keep root, this guide will help you flash an update.zip full ROM or OTA ROM and keep root in Android.
Works with phones other than MT6755 Helio P10 Meizu
Note, while this tutorial is written using Meizu M3 Note, FlashFire and this tutorial will work with any rooted phone. It doesn’t have to be Meizu M3 Note.
Prerequisites
- Android 4.2 Jelly Bean or newer
- A rooted phone (Either SuperSU or true Meizu System root are okay. If rooted with Kingroot, use this guide first to change to SuperSU from Kingroot.)
Backup your important media
- Make sure your important pictures / videos / media / documents etc… are backed up
Downloads for this flash ROM without recovery guide
- SuperSU.zip for flashing through recovery This is optional. If you don’t care about having the new ROM already rooted you can skip this step
- FlashFire.apk This is the tool that will flash your ROM without using recovery mode
- build.prop This is for Meizu M3 Note going to 5.1.3.2G only. If you’re following this guide with a different phone, skip step 5.
- Your Meizu M3 Note ROM / OTA / file to flash
Step 1
- Copy the SuperSU.zip and the ROM to be flashed to the base of your Meizu M3 Note internal storage
Step 2
- Install FlashFire.apk onto your Meizu M3 Note phone
Step 3
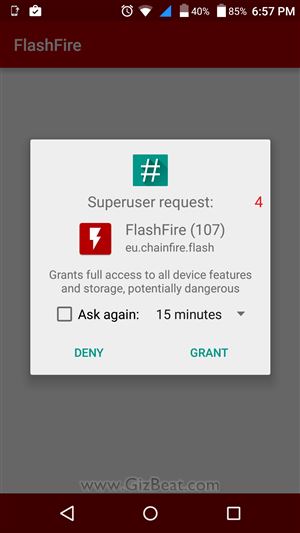
- Start FlashFire
- Make sure you allow any SuperSU root permission requests from FlashFire. This is very important. If you don’t allow the request, then FlashFire will not be able to flash your Meizu M3 Note ROM
Step 4 – Select the ROM
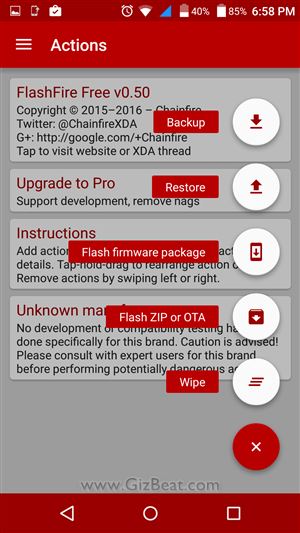
After root permission is granted to FlashFire, you will see a menu on the left side
- Tap “Actions”
- Tap the big “+” in the bottom-right corner
- Select “Flash ZIP or OTA”
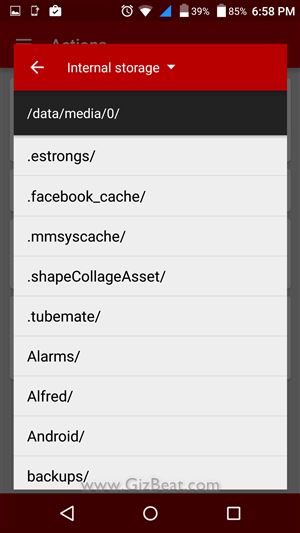
- Navigate to the MTK6755 Helio P10 Meizu M3 Note Global ROM you want to flash and select it
- Wait for it to check the package. This step may take a few minutes
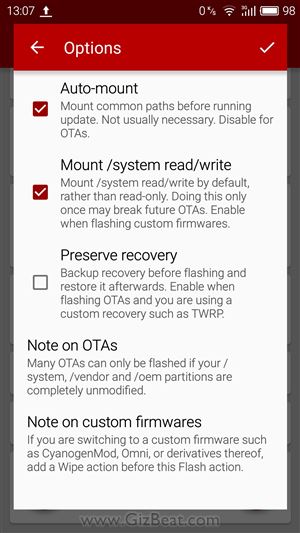
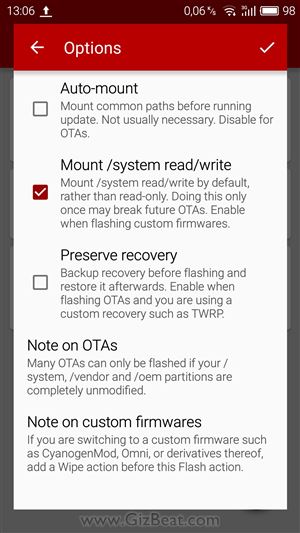
- Select “Auto-mount” and “Mount /system read/write” if they’re not already selected
- Hit the “✓” in the upper-right corner


Step 5 – Select build.prop (Meizu M3 Note ONLY)
This build.prop will make sure your Global 5.1.3.2G ROM keeps the display proper. If not using this build.prop, it may end up reversed. This is ONLY for Meizu M3 Note going to 5.1.3.2G.
- Tap the big “+” in the bottom-right corner again
- Select “Flash ZIP or OTA”
- Navigate to the build.prop.zip you downloaded earlier and select it
- Select “Mount /system read/write” if it’s not already selected
- Hit the “✓” in the upper-right corner
Step 6 – Select SuperSU.zip
This step is optional, but we highly recommend it. It will make sure you stay rooted and will give you the official SuperSU ChainFire binary and .apk control app.
- Tap the big “+” in the bottom-right corner again
- Select “Flash ZIP or OTA”
- Navigate to the SuperSU.zip you downloaded earlier and select it
- Select “Mount /system read/write” if it’s not already selected
- Hit the “✓” in the upper-right corner
Step 7 – Select Wipe options
- Hit the “+” again
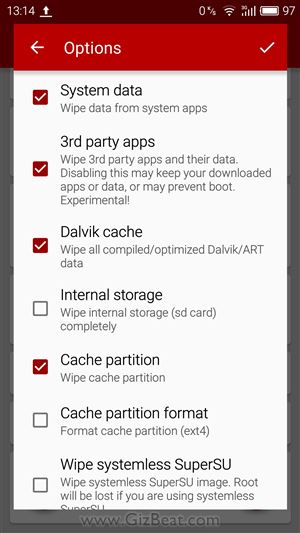
- Select “Wipe”
- Check “System data”
- Check “Dalvik cache”
- Check “Cache partition”
- “3rd party apps” – If you want to try and leave your apps and data (dirty flash), then make sure “3rd party apps” is deselected. However, to minimize the chance of anything going wrong, especially if making a big ROM change, we suggest a “clean flash”, which will wipe your 3rd party apps and data.
- Hit the “✓” in the upper-right corner
Step 8 – Flash the MT6755 Helio P10 Meizu M3 Note ROM
Now is the moment of truth. Don’t be too nervous, as many thousands have gone before you successfully. That being said, you take this step at 100% your own risk.
- Scroll down until you see the “⚡” lightning bolt icon in the bottom-left corner
- Tap it
- Assuming you accept the risk, go ahead and approve any warnings that may pop-up from Flashfire
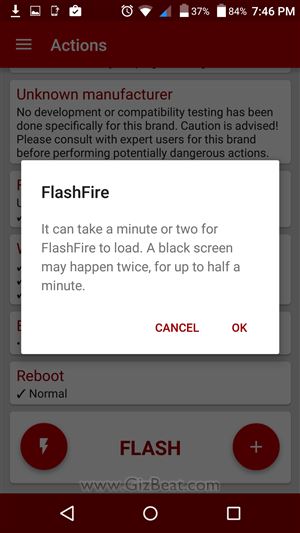
Step 9 – Wait
- At this point you may see a black screen. This black screen may show for up to a minute. Be patient and just wait. Do not interrupt.
- When the flash is finished, the phone should auto-reboot to rebuild Android from the newly flashed .zip / ROM / OTA.
Bam! Done. Thanks for reading and let us know how things have worked out for you in the comments.
Leave a Reply to Khánh Nguyễn Cancel reply